 Philips
Toucam Webcam
Philips
Toucam WebcamThere is much interest in the use of webcams for astronomical imaging. They can yield high quality images of the moon/planets - often difficult to match even with expensive cameras. This works by taking hundreds of images either as an AVI movie file or just a collection of bitmaps. These will be collected over a minute or two - during this time there will be moments when images are sharp and others when they are blurred due to atmospheric distortion etc. Free software (eg Registax) allows you to automatically discard the blurred images & sum the good ones, then further process that to get the sharpest image. You don’t need perfect skies for this !! But it helps to have steady skies to get the best images.
One of the first and most popular webcams used for
planetary imaging was the Philips Toucam Pro, but sadly it is no longer made,
but is often available on E Bay. But try any webcam – those with CCDs rather
than CMOS sensors are best. CCDs have better sensitivity in low light situation
than CMOS.sensors. Examples are the Ame CU98A, the Compro PS39, the Creative PC
CAM 600 and several by Logitech, the Philips SPC880NC etc. Try to avoid
‘megapixel’ webcams as they usually compress the images producing noise.
Philips
Toucam Webcam
Next up from webcams, most telescope manufacturers and many suppliers now sell planetary imaging cameras eg Celestron Neximage, Meade LPI, Orion Solar System Imager etc. These sell for around the Ł100 mark, but shop around ! By the time you have bought a top end webcam and adaptor you might be spending this sort of money anyway so do seriously consider one of these.
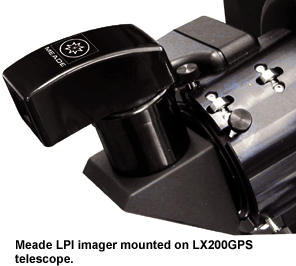 The
excellent Meade LPI imager.
The
excellent Meade LPI imager.
Next up come video cameras designed specifically for astronomical use so they take lots of frames quickly. One example is the OpticStar 131C Colour Video Camera, with a resolution of 1280x1024 pixels. This is ideal for planetary and lunar imaging and sells for around Ł150.
For high frame rates you obviously require short exposures
and thus low noise, high sensitivity imaging chips. Manufacturers include
‘Imaging Source’, PGR and Lumenera
These can capture images up to 60 to 100 frames a second. The cost is from
Ł300-Ł400 upwards. These cameras produce the highest quality planetary images
and are used by serious amateur planetary imagers.
 Imaging Source High Frame Rate Camera
Need to be able to fit the webcam to the scope. Dedicated planetary cameras are made to fit into a standard eyepiece holder. For webcams, most astronomy retailers will supply adaptors to allow them to fit into an eyepiece holder. Make sure if you buy a webcam that an adaptor is available !! It is also worth considering an infrared blocking filter. This is because webcams are quite sensitive to the infrared end of the spectrum and being longer wavelength than visible light it wont focus at the same point. Therefore images will look blurred. Cutting out the infrared will yield sharper images. Signal connection is usually made through a USB cable from the webcam plugged into a computer.
You don’t need an expensive telescope to image the planets and the moon or indeed the sun. You do need to be able to keep the planet in the field of view, so a scope with a drive is really needed, but it needn't be an expensive ;scope with an accurate drive. Jupiter and the moon can be imaged by any virtually any telescope. Saturn can be a little tougher as it is fainter than Jupiter (has lower surface brightness), so larger telescopes (8” and larger) produce better and brighter images. You also need a telescope with a high f ratio (ratio of focal length to objective size) to get decent sized images. F ratios of 15-25 are typical. If your 'scope has a lower f ratio then you can increase the f ratio by using Barlow lenses which will multiply the f ratio by x2, x3, x4 etc. The better quality Barlow lens you use the higher the quality of your images. You also need a computer to run the software to collect the images!
To capture images you need software running on your
computer. If you buy a planetary Imaging camera it will probably come with the
software you need. If you plan to use a webcam, then you need to either purchase
a programme or find some free software. Options include:-
AstroSnap - http://www.astrosnap.com
- sadly this is not free anymore but it is a good programme.
Handyavi http://www.azcendant.com/
K3CCD Tools -
http://www.pk3.org/K3CCDTools/
For image processing, you need to be able to select the sharpest images, stack
them and then process them. I use
Registax for this – version 6 is now available.
I then do final post processing in Paint Shop Pro, but you could use other
programmes like Photoshop or the freeware GIMP (www.gimp.org).
Let the scope cool down to ambient temperature – this may take an hour or more. Make sure your scope is properly collimated. Get the planet in your field of view then replace the eyepiece with your camera. Start the software and view the image on your computer screen. Focussing is critical !! Try focussing one of Jupiter’s moons or a nearby star – this is much easier than focussing on the planet’s disk. Seeing often improves after midnight and you may get sharper images then. Seeing also varies from day to day - some days the image may appear to be 'bubbling' and you cannot get a sharp image. But occasionally you get a really still and calm night when you get sharp views and good images, so keep trying.
Camera software has many settings ! If you are using a
webcam, keep the frame rate down to 10/second or less, or it may start
compressing images and introducing noise
Adjust the exposure time to give you a bright image on the screen. Turn off the
automatic colour correction and adjust this manually (you can usually correct
for this in processing later if necessary). The Gamma setting affects contrast
and brightness – leave it in the middle for now. Play with gain versus exposure.
The aim is to capture many hundreds of frames – these may be as a video or as
individual frames.
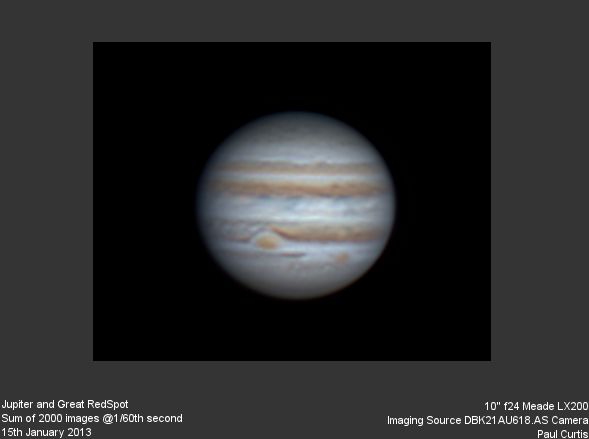
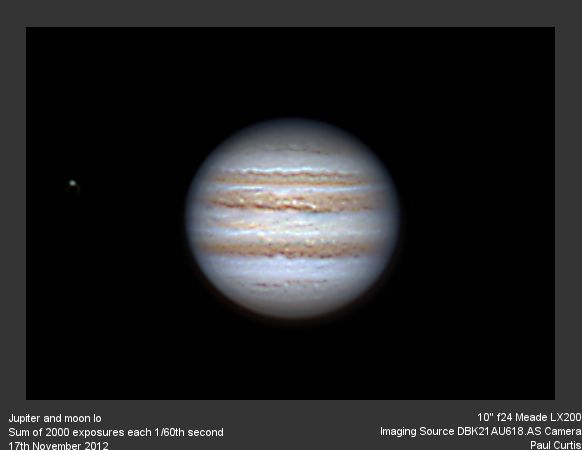
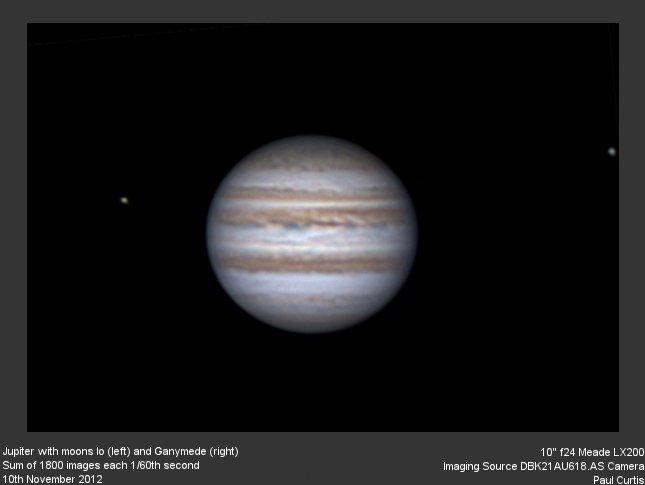
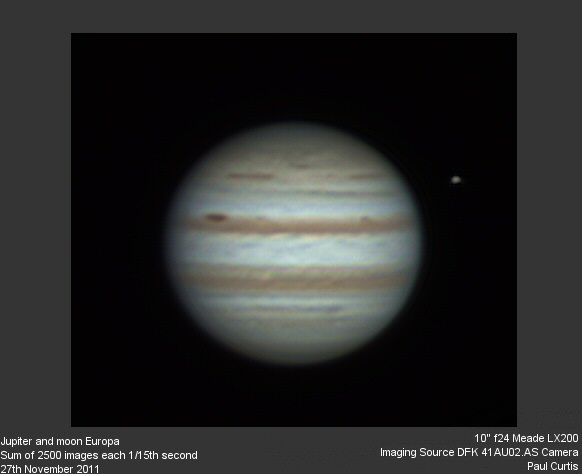
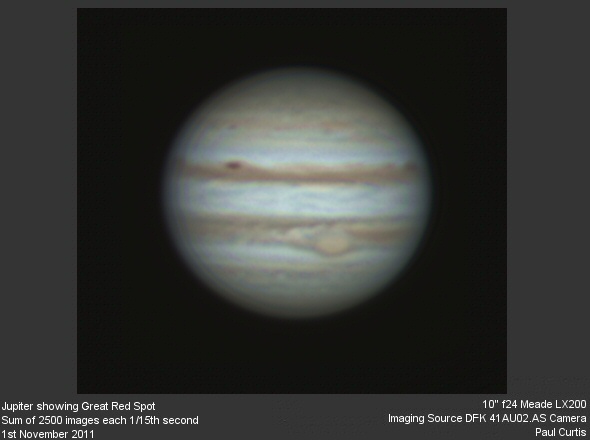
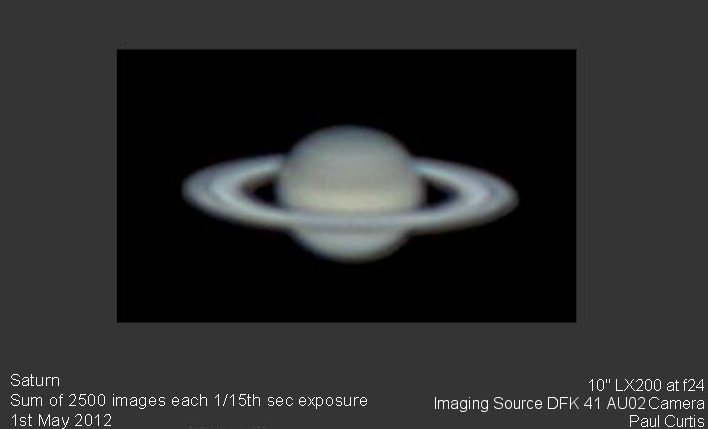
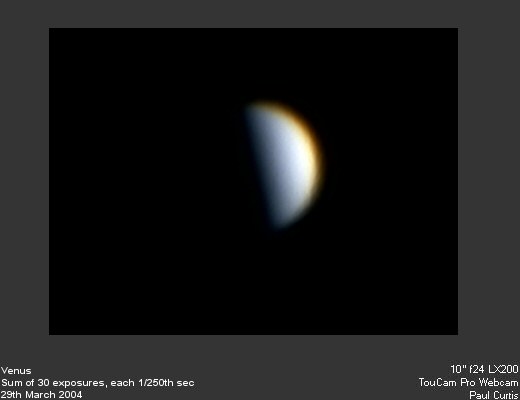
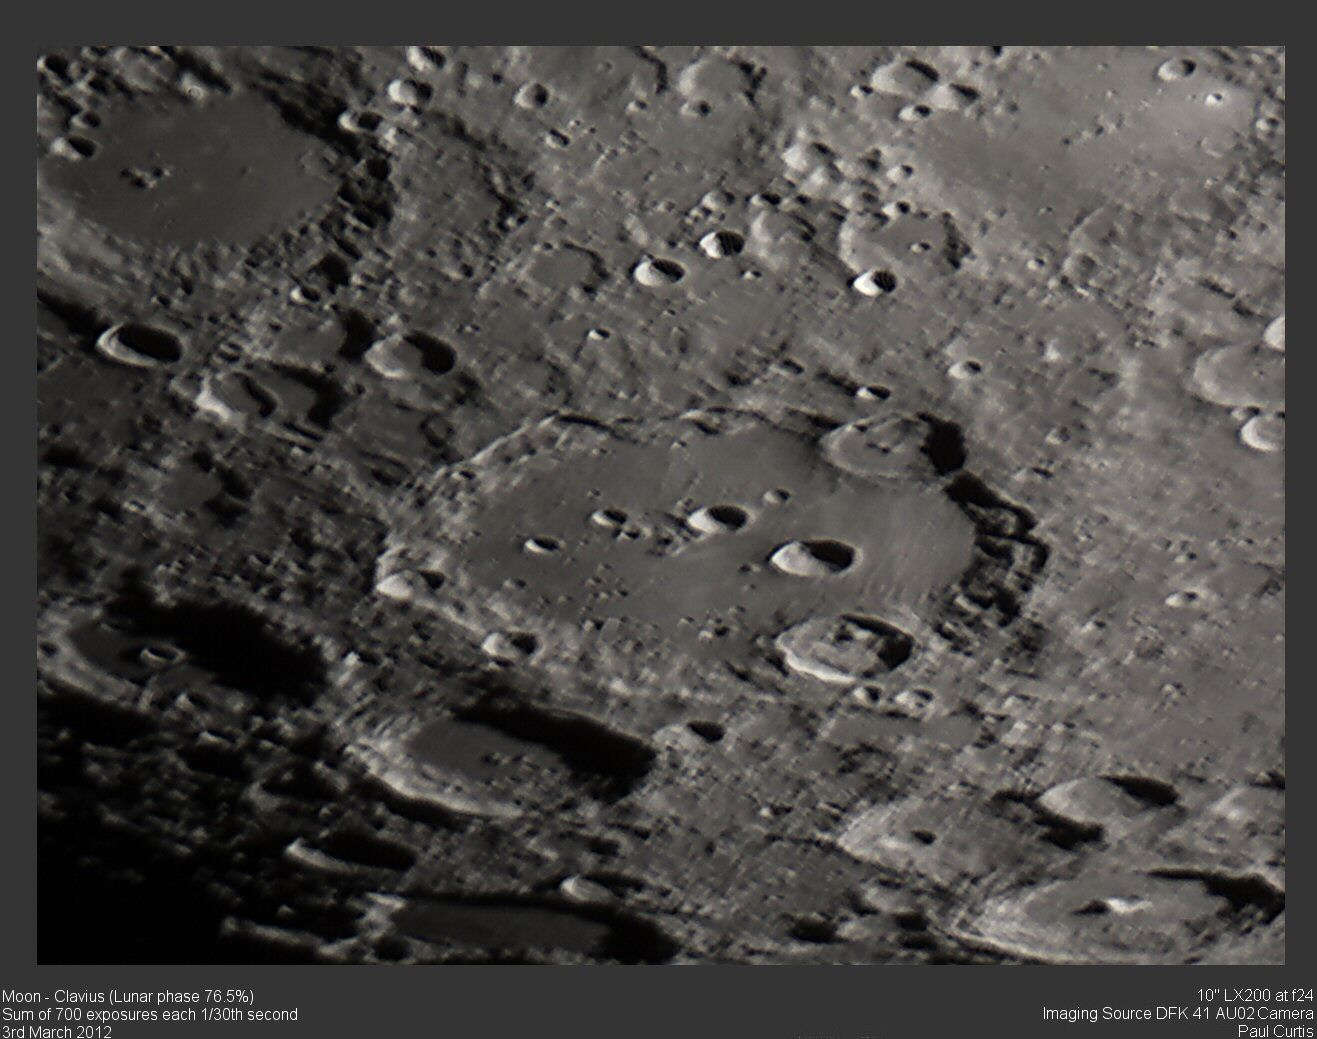
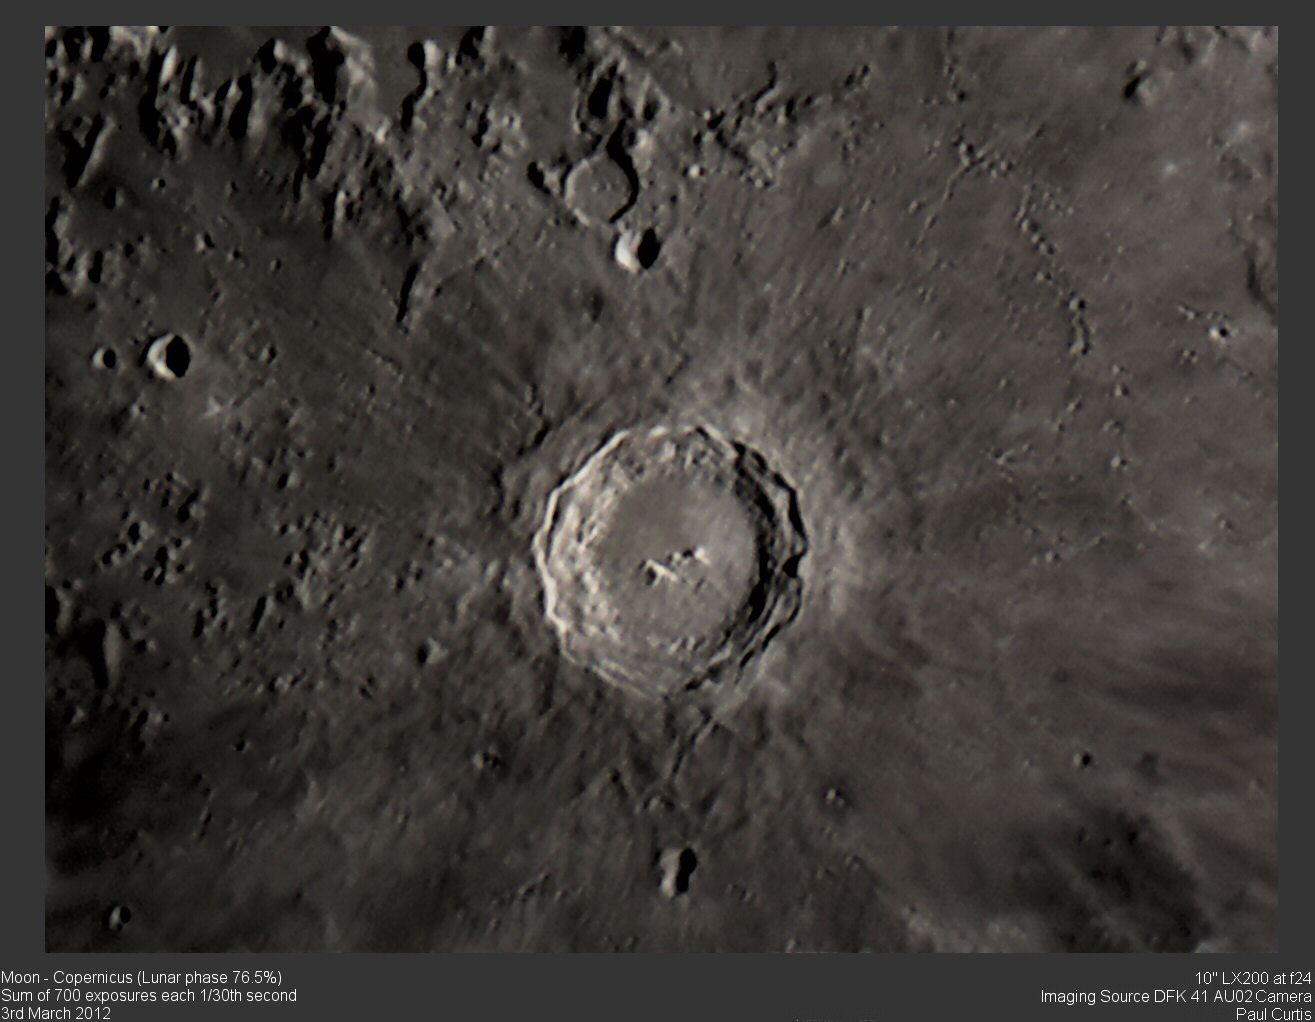
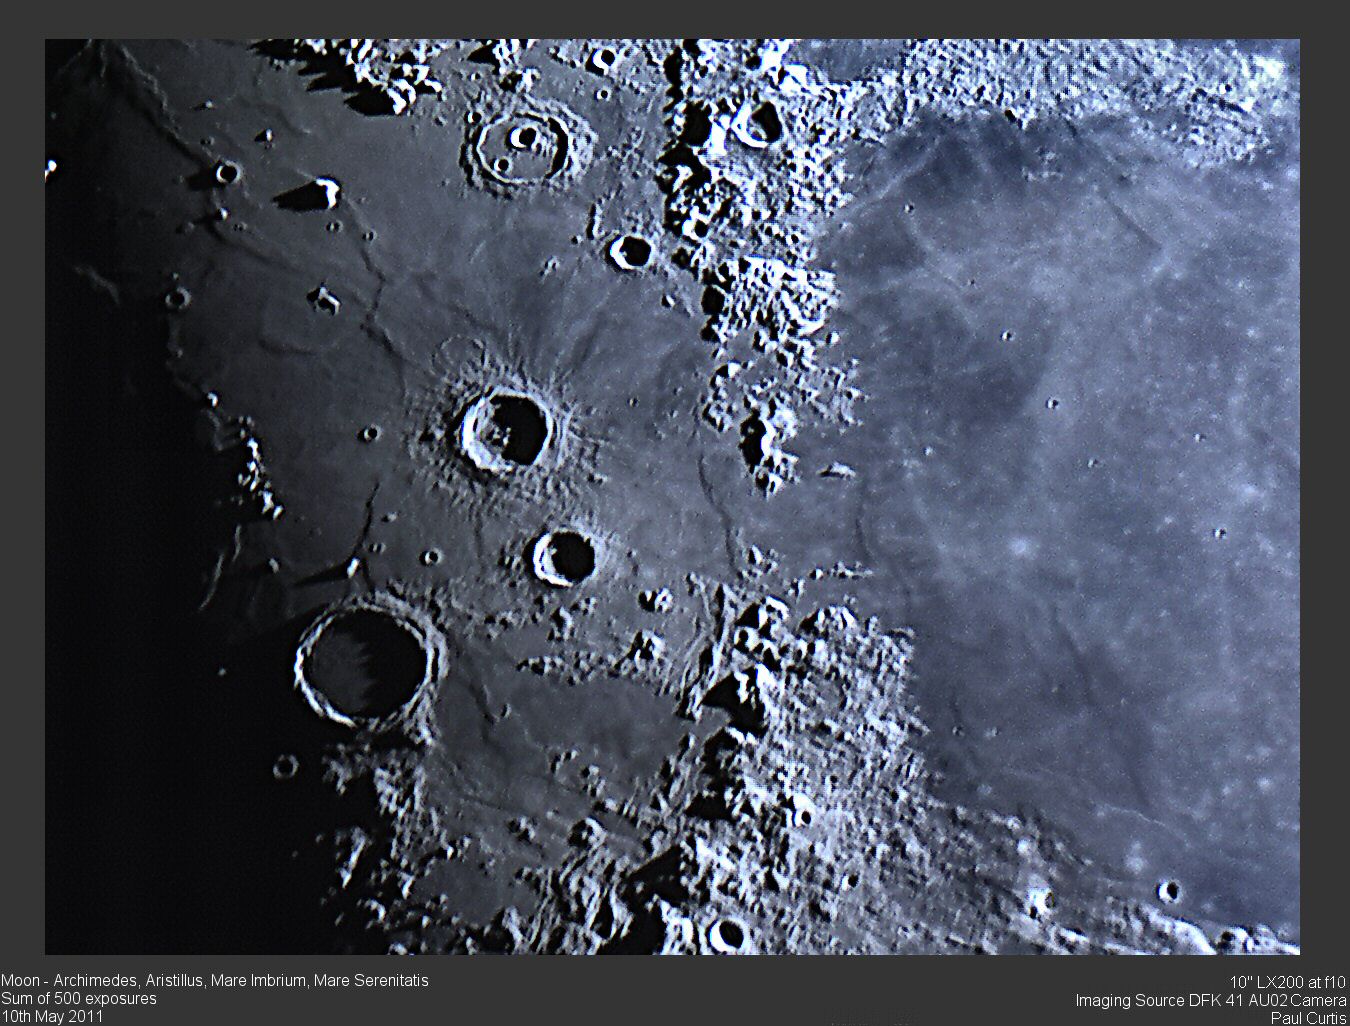
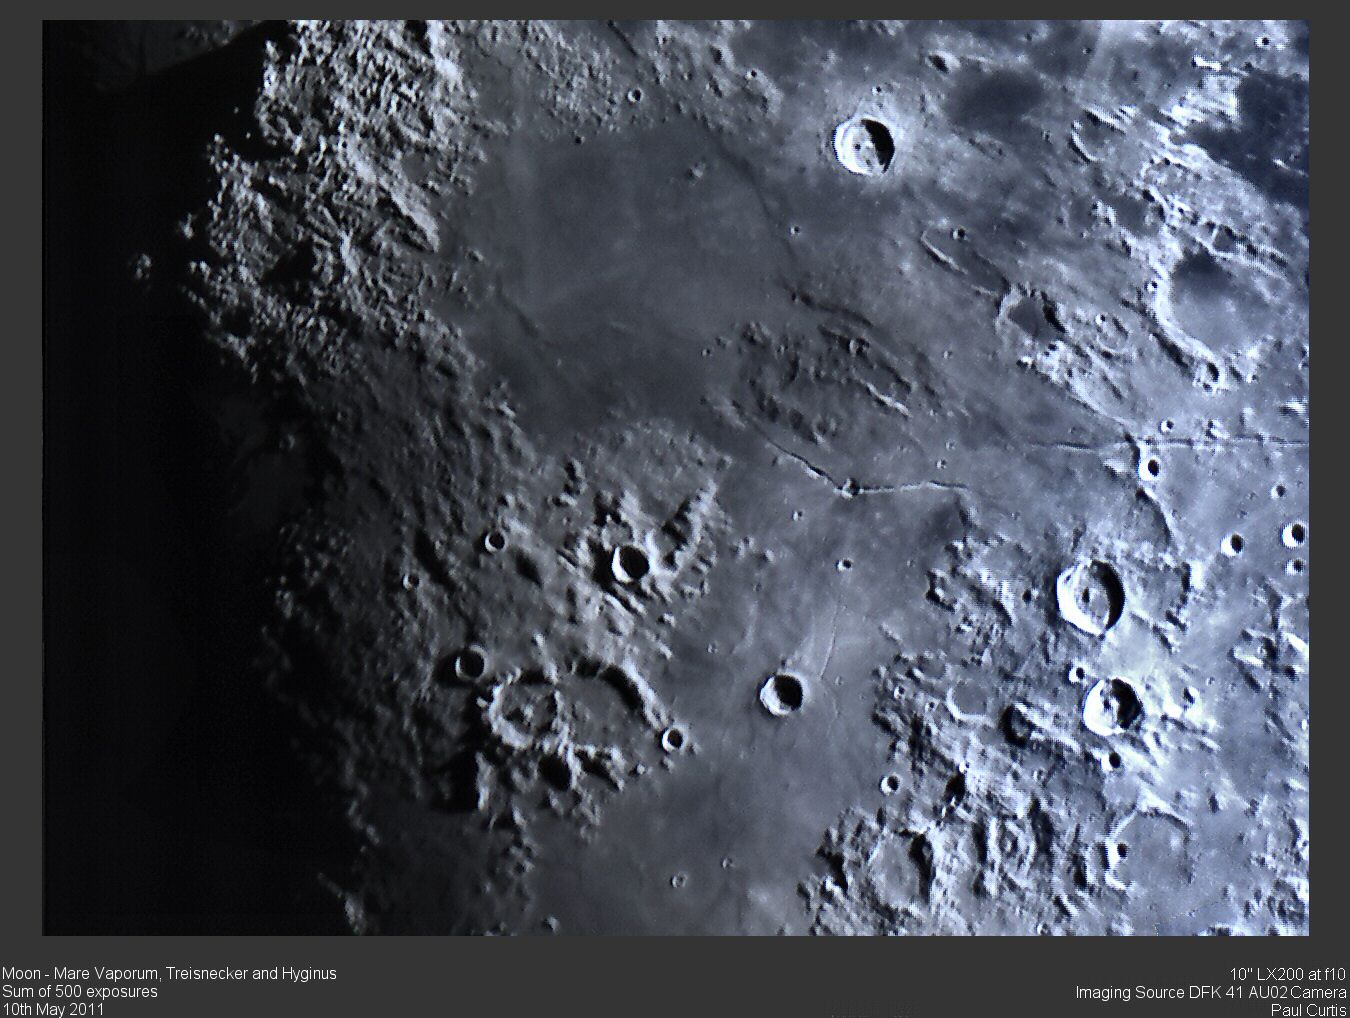
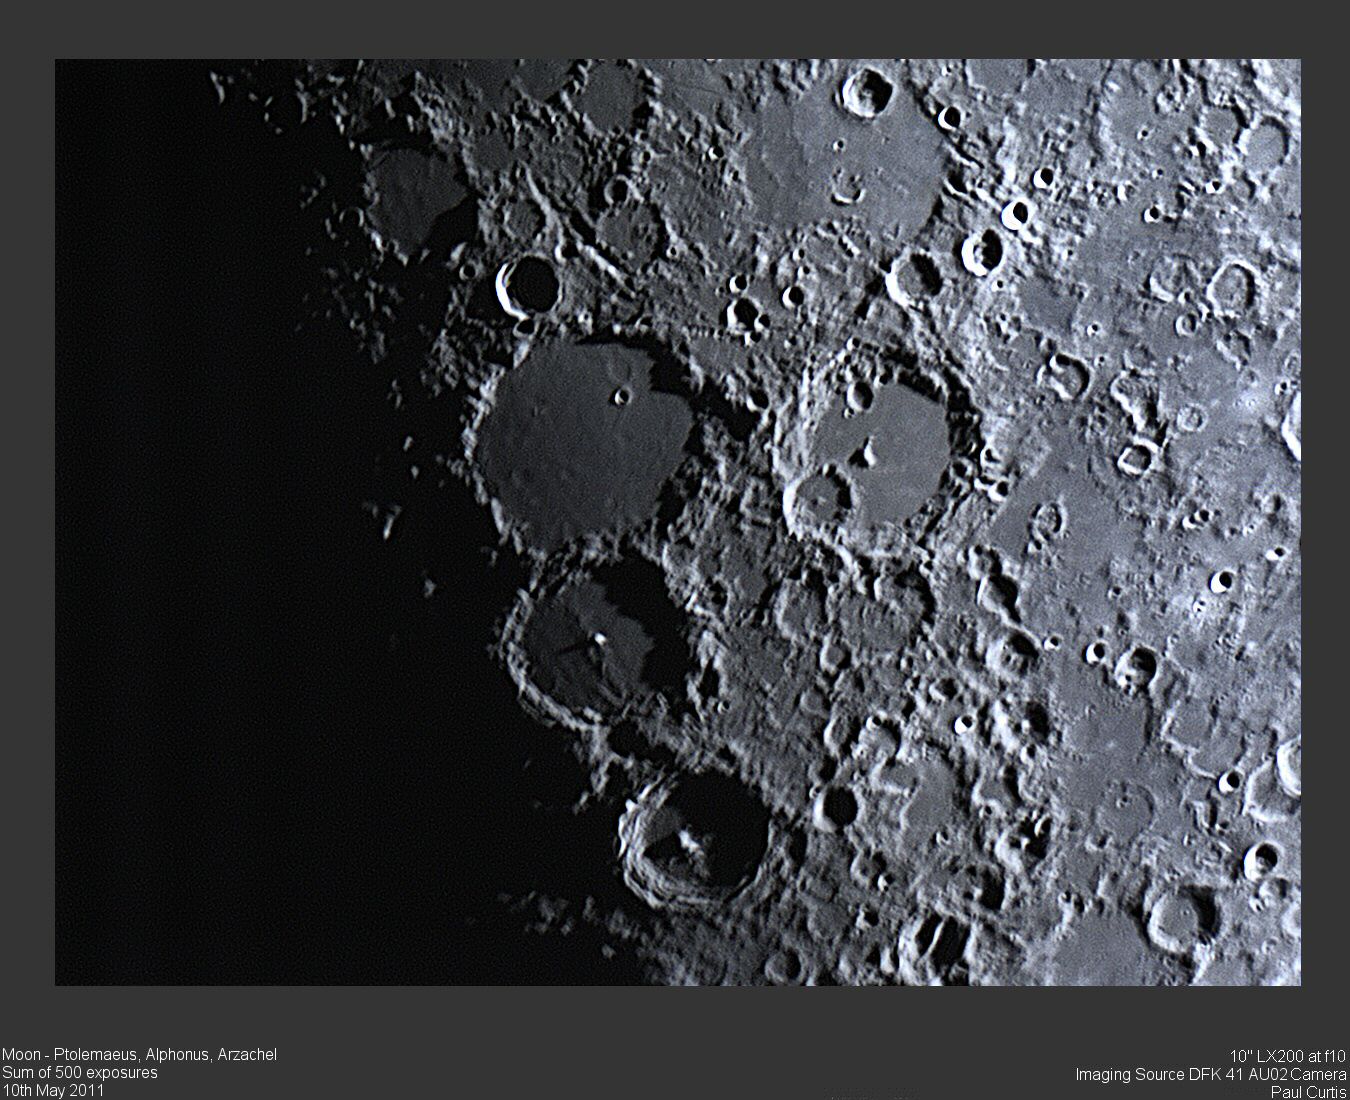
Some examples of planets and the moon photographed this way:-

Small digital cameras can give interesting images